Wednesday, July 1, 2015

Not at ISTE? Impossible!

This is a quick shout out to all the peeps at #NotAtISTE on Google+ and Twitter (and Voxer)!

This week the International Society for Technology in Education (ISTE) held their annual technology in education conference.  Having been involved in the field of educational technology integration for the last three years, I have learned a plethora of information on Twitter and by reading blogs by those tech gurus on Twitter.  Once a year those gurus, as well as thousands of technology integrators, teachers and others, converge on one of the larger US cities when school lets out to attend a conference to learn about the latest trends in educational technology.  But many cannot attend so they watch from the sidelines via Twitter hashtags like #ISTE2015, to glean as much information as they can.

But with new advances in mobile technology, we can now attend at least some of the conference virtually!  I have always loved technology, having worked in the high-tech field in the 80's and 90's, but since the invention of tablets and smart phones and the development of Web2.0, it's scope has grown exponentially.  Tony Vincent (@tonyvincent) used a mobile app called Periscope to broadcast video that people can watch real-time and even comment and ask questions. Jeff Bradbury broadcast his TeacherCast interviews. Google Hangouts on Air also allowed many of us to attend Ignite sessions via the #NotAtISTE Google+ community, which is a group of people who could not make it to the conference, so they started a virtual conference. All of these opportunities enforce my belief that technology is a great tool for education.  Members of the group created virtual NotAtISTE badges, mimicking the ones that they use at the IRL conference, complete with ribbons. They participated in challenges, a Voxer chat group, Bingo games, Karaoke parties on Voxer (virtual Karaoke parties!), as well as keeping up with the posts and videos from the conference.

Being part of the NotAtISTE group, for my second year in a row, I have to say it may be as good as attending the conference in person. As someone said, at least we don't have to worry about getting to the airport to catch our flights home, and it is a lot cheaper.  Last year people at the conference complained about long lines and not being able to get into the sessions because they were overloaded, so at least we didn't pay to go and still miss out!

Technology is the way of the future, and so it should be included in our educational system.  We need more teachers to join us on Twitter and Google streams and at technology conferences and edcamps so they can understand the value of this tool.

Oh, and thanks to Jen Wagner, Craig Yen, Lisa Dabbs, and Sue Waters, as well as all of the other contributors and participants for sharing a great week.

Wednesday, March 18, 2015

Twitter Chats and Storify


This is a post about using Twitter Chats for educational professional development purposes. It is also to show how you can upload a Twitter chat into a Storify story and then embed it into a blog post. 

I participated in a Twitter chat, ATchat, tonight. I learned about some great apps, which coincidentally was related to something I was searching for to help a teacher use his iPad with a student.  It just so happened that someone mentioned the apps at the beginning of the chat, not even related to the "official" chat topics!  I wanted to save the chat for future reference so I saved it in Storify.  As you can see from the Storify story below, there was a lot of information sharing going on in this particular chat. 


Storify is an app that lets you curate information, images, videos, and whatever from the web and put it into a storyboard format, to save for later or share. This one consists of the posts on the Twitter chat, in order.  I didn't edit anything out, although you can choose what to put into your story.  After you save it, you can get an embed code to share in an HTML document, such a your blog in the HTML input view, which is done in Blogger by clicking the HTML tab (above left) and pasting in the code, which I did below and Voila! now you can see my Storify story.  Easy!


Sunday, January 11, 2015

Using Web 2.0 in the Classroom

Web 2.0 is the next generation of the World Wide Web, which allows users to create content, interact with others to collaborate and share, download, remix and publish new content.  Web 2.0 tools help users to do these things and the great thing is they are accessible anywhere there is Internet access. 21st century educators use these tools to enhance their students' learning, communication and creativity.  

Discovery Education (2013) says that Web 2.0 tools fall into four categories: presentation tools, video tools, mobile tools and community tools. 


Presentation tools such as PreziemazeGoogleSlidesSlideshareVoiceThread and HaikuDeck, help you to create presentations online and, in most cases, for free.  

Video tools, such as AnimotoYouTubeVimeoJingPhotobucket, and Movie Masher, allow users to create and/or share their videos or photo slideshows with others. 


Mobile tools and community tools cover a wide range of tools from learning management and polling tools, like
PollEverywhereSocrativeNearpod Quizlet, TitanPad and Padlet to Nings, wikisblogging toolsGoogleDriveEdmodoTwitter and other community-based creation and sharing tools that cater to gamers, game designers, writers, artists, music lovers, and even educators. 


I used Google Slides with my students to create a group presentation.  Each student created one slide within the presentation with a quote they chose from Brainyquotes.com and an image, to illustrate something they loved or about which they were passionate. When it was done, we had a great presentation to share with everyone.  I like that Google allows you to control who can access each individual document.


I have also used Scratch to teach problem-solving (as well as programming concepts).  Scratch is a community-based website where users can create video games or animated stories and interactive greeting cards using drag and drop programming blocks. They can share their projects with the community. It is expected that they will remix and reuse one another's projects to create their own. Scratch keeps track of each creator and automatically creates acknowledgments for each contributor to the remix tree. Users can also ask others in the community for help on their projects if they get stuck.  You can also create galleries, for curating projects by category. I created a gallery for my class to share their projects with each other. 


Another tool, I have used, is Storybird which is a storybook creator which uses amazing artwork, submitted by artists, to inspire writers to create stories about the pictures. Students can create electronic books, stories or poetry, which they can publish or share with friends via social media or email.  There is an education portal where teachers can create a class library as well.


You walk into the bathroom
 to find this. Write the story.

(C) 2015, RSA group
I recently discovered another writing prompt tool, which is in beta version currently, called Write About. Write About is a social publishing platform (RSA group, 2015) developed in 2014 by two teachers, John Spencer and Brad Williams, and provides visual writing prompts or ideas, like the one on the right, to inspire students' writing.  I plan to use this tool with my digital literacy students this year.  This one also allows the teacher to set up a private classroom group as well as control whether students can submit to the public site or just the group. 


Sources cited:

Discovery Education. 2015. Web 2.0 Tools. From:  http://web2014.discoveryeducation.com/web20tools.cfm

RSA Group. 2015.  About Write About. From: http://www.writeabout.com/about/

Saturday, November 22, 2014

iOS8 Features for (Special) Education

The following lists some of the new features I have found through various sources that would be good for the classroom iPad. Many of the features improve the accessibility of the iPad for some disabilities.

Speak Screen

When Speak Screen is turned on, using a two-finger swipe from the top of the screen (or using Hey, Siri, see next item), will start a screen reader that will read back everything readable on that screen, like unlocked text and some buttons, while highlighting each word as read. You can pause, change speed, go back, using the buttons on the Speak Screen control panel. Helpful for struggling readers or those with vision problems. On/off switch in Accessibility Settings/Speech.


Hey Siri!


When your iPad is plugged into power, you can summon Siri with your voice (like OK, Google) without holding the home button, then use Siri to open apps. It can also be used to activate Speak Screen (above) instead of using swipe, just say Hey Siri, then Speak Screen.


Safari Reader


 Before Safari Reader applied       After Safari Reader applied  


Safari Reader reduces the visual clutter on a web page by removing distractions. It strips away ads, buttons, and navigation bars, allowing you to focus on just the content in an article. Just tap the horizontal lines to the left of the URL. Text size can be changed as well. Safari Reader also works in conjunction with Speak Screen.


Word Prediction

Word prediction is now integrated into iOS 8. Words appear at the top of the keyboard. It suggests words and phrases based not just on to whom you’re writing, but also in what app you’re writing. Easy for switch users to scan to and select.


Dictation


Dictation lets you speak to type. Tap the microphone button on the keyboard, say what you want to write, and your iOS device converts your words (and numbers and characters) into text now with real time feedback, so you can see errors in transposition immediately.


New Search Engines


Safari lets you change the default search provider for the first time. DuckDuckGo (which doesn’t track your browsing), Yahoo and Bing as alternatives to Google search, which you can find in the Safari section of the Settings app.


Recover Deleted Photos

Photos that are deleted will be saved in a separate folder for 30 days. Nice way to recover accidentally deleted photos!


Photo Timer


Tap the timer icon that appears by the on-screen shutter button to choose between a three second and a ten second delay.


Change photo exposure


This may be useful in low lit classrooms. When taking a picture, tap the screen and a sunlight icon appears next to the focus frame—slide this up or down with your finger to change the exposure level and the amount of light let into your shot.


Shoot Time lapse video


Open the Camera app and use the slider to select Time Lapse. It captures one frame of video every second. Time lapse videos could be used to shoot the class working on a project, or to see a class pet's movements.


Alternative Keyboard Apps


iOS8 allows installation of third-party keyboard apps. You can pick up Swype for $0.99, or SwiftKey for free, both of which learn how you type.  More to come too.


Guided Access Enhancement

With iOS 8, you can now set time limits on how long an app is locked and lock the iPad when time is up.


Font Adjustments


When you activate Larger Dynamic Type, the text inside a range of apps in iOS 8 including Calendar, Contacts, Mail, Messages, Music, Notes and Settings, and even some third party apps, is converted to a larger, easier‑to‑read size.


Invert Colors and Grayscale


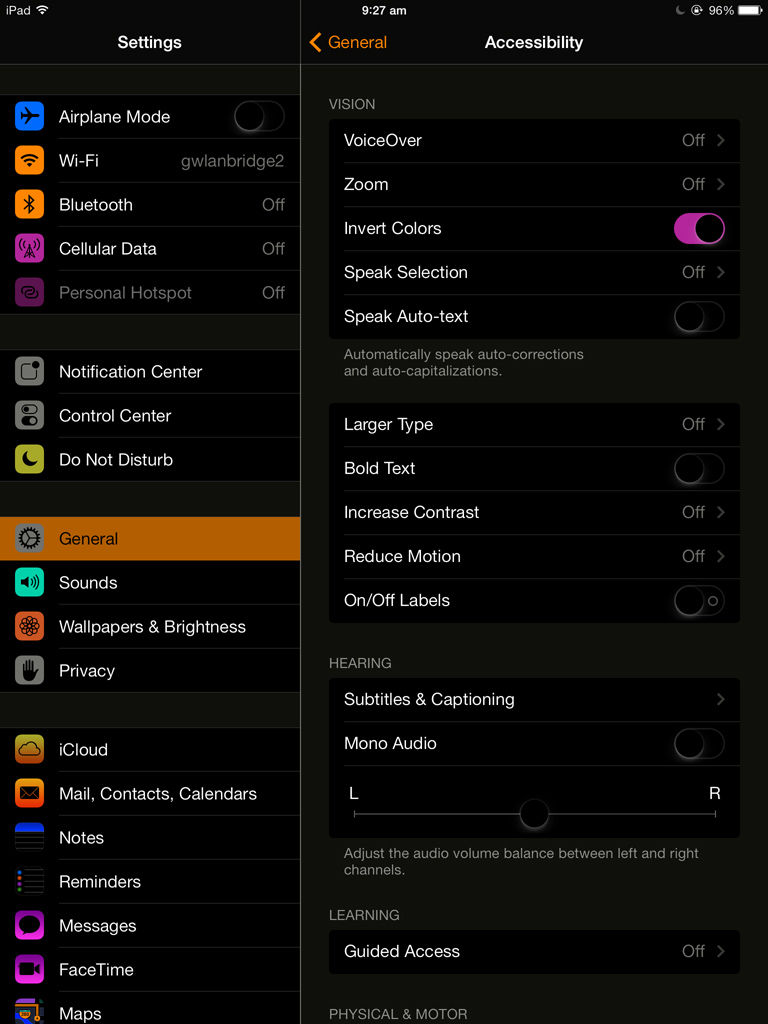
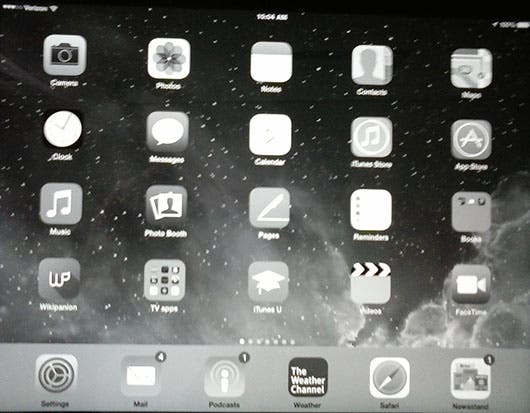
If a higher contrast or a lack of color helps you better see what’s on your display, iOS lets you invert the colors or enable grayscale onscreen. Once you set your filter, the settings apply system wide, even to video, so you get the same view no matter what you’re seeing.


Zoom

The zoom options in iOS 8 have been greatly expanded to give the user more control.


Gliding Cursor Speed for Switch Users

The speed of the gliding cursor has been greatly reduced at the lowest setting. In iOS 8 it takes approximately 15-seconds for the gliding cursor to get from one side of the screen to the other versus just 5-seconds in iOS 7. This slower speed will help individuals who are unable to react as quickly as other users.


See what's using your battery


In the Settings/General/Usage. Tap on the Battery Usage entry and you can see exactly which apps are taking up all of your precious battery power.


Quick Web search using Spotlight


Swipe down on the home screen to access Spotlight, type out a few words and you'll notice that Web links now appear alongside results from apps. You can change options in Settings/Spotlight.


Change Sharing Options

You can rearrange the sharing options by dragging them where you wish. You can also disable some sharing options, such as Twitter, Facebook, Flickr, by tapping on the More option.


Tuesday, June 24, 2014

Voice Messages on your Blog!

I recently discovered a tool called SpeakPipe which allows readers of your blog to send you a voice message.  Messages will show up in your SpeakPipe account, and you will also receive an email message when you receive a voice message in the email that you set up on your SpeakPipe account. 


The free plan allows you to have 20 messages per month, of a maximum duration of 90 seconds each.

Just embed the code in an HTML widget on your blog and you are good to go.  Directions are here. You will see a tab on the right side of your blog that says, Send Voicemail. Users just click record and send.  Check it out by clicking on the tab to the right, or you can do a test at speakpipe.com.

Friday, May 23, 2014

Digital Storytelling


UDL allows for students to use alternative ways to "write" stories and explain what they know. Using technology to write digital stories, using pictures or voice to text functionality, allows students with reading and writing difficulties to tell their stories.  Plus it's more fun!

Here are some web and iPad apps that I have used, or at least played with:


Web apps:

Meograph – Uses a timeline and maps to create a 4 dimensional story.


Storybird – The site provides beautiful artistic images submitted by artists which you can use to illustrate and spark ideas for a story.  Free for up to 35 students.


Scratch – A simple programming tool that uses blocks that snap together to form scripts (programs) that let you move characters around a stage, import sounds, use speech bubbles or voice recordings to create a story or project, even video games, while learning basic programming lingo. Free.


Simple Booklet – Lets you create digital books by inserting photos, images, videos, and adding text.  You can format the pages like you do a word document. Can be shared with anyone via the internet. Teacher account is $10/yr for 30 students.

simplebooklet.com simplebooklet.com
Click the arrow to change the page, or go to this link:
 http://simplebooklet.com/kenya for a larger view


StoryboardThat lets you customize  cartoon characters by changing physical attributes and then use speech bubbles to create dialog. Can upload or create vector images with paid versions. Up to 15 blocks for paid versions, or 6 for free version.


More Web Apps:

Powtoons Allows you to create animated slideshows by dragging and dropping characters, props and text plus record your voice to narrate the story.

GoAnimate – Another cartoon creation tool which you choose from a cast of characters, scenes, sound effects, and allows recording of speech starting at $99 per year, based on # students.

VoiceThread – A presentation tool that allows you to collaborate, create and share digital stories using imported drawings or presentation slides.

Bitstrips – A comic strip creation tool that allows you to create fully customized characters and add dialog bubbles to create a story.


iPad apps:

Toontastic – Allows you to create animated cartoons on the iPad. $9.99 for school addition, contains all the in-app additions from the free version.

Pictello – An iPad app that lets you import images and text or voice to create a digital talking story. $18.99

Educreations A presentation or storytelling app, allows you to narrate while drawing or inserting images.  This app is free.

iMovie Trailer – Allows you to create a movie trailer type of story using photos taken with your iPad or imported images. Add text and music and create a dramatic “preview” story. iMovie is an app on iPad or Mac.


BookCreator (iPad)  Lets you create iBooks for your iPad by importing pictures, video, sound, and use text, handwriting or voice recording.  Can export and share as well.

30hands – Is an iPad app that lets you easily create narrated stories and presentations using photos, images, and drawings and recording your voice to tell a story.

Do Ink Animation – An iPad app that allows you to create animation paths using your finger, draw your own illustrations or use stock illustrations in the app. 


Sources:
Hughes, A. (2013) Causes of the civil war. Meograph. [Slideshow]. Retrieved from:             http://www.meograph.com/ahughes17/15303/causes-of-the-civil-war

Ray, R. (2013). A midsummer night's dream. StoryboardThat.com. [Storyboard]. Retrieved      from: http://www.storyboardthat.com/userboards/rebeccaray/a-midsummer-nights-dream

Medeiros, C., Koren, N. and Peb08.  (2013). Pass it on, Halloween tale remix. Scratch  Community. [Scratch  programming project]. Retrieved  from:   http://scratch.mit.edu/projects/13875740/
Rueppel, L. (2011). Becasue of Mr. Terupt by Rob Buyea . [Youtube video]. Retrieved  from  https://www.youtube.com/watch?v=2hLAuVHAo8M


Tuesday, May 13, 2014

Social Media in School?


Many schools struggle with the decision to allow social networking sites in school. I wrote this post on my other blog for a class I am currently taking in technology integration. 

Saturday, May 3, 2014

Augmented Reality

I have discovered a new tool called Augmented Reality. There are several apps and websites related to this medium which has many applications for education.  One of the iPad apps I found that illustrates how AR works is AR Flashcards Space.  This app comes with a link to print out the flashcards, which when scanned with the app, reveal a 3 dimensional rotating planet.  When you tap on the planet its name is spoken and tap on the "i" for more information on the planet. The Flashcards Space app costs $3.99.  There is also a free app called AR Flashcards Animal Alphabet, which has a card for each letter with 3D animals. 


If you like that app, there are several other apps and web tools you can use to create your own AR auras.  One that I have played with is called Aurasma, which is both an iPad app and a website (with even more features).  You can have a picture on a bulletin board trigger a video or link to a website - which means lots of educational applications.  Using the app, kids could do video book reports and then attach them to a picture of the book so that others can get a preview of the book in the library.  A teacher could record an explanation of how to solve an advanced math problem and use a trigger image, the problem, to start the video.  You can also link to websites with a tap on the image or video.  This great 3-minute video was created by a high school student from Burlington, MA, and it shows how simple it is to create your own AR aura using Aurasma.


Other AR applications include LayAR which can be used to add multimedia information to printed magazines and much more. ColAR is an app that brings children's coloring pages to life (link to free pages included, additional pages are in app purchase) and Spacecraft 3D by JPL (free) allows you to "play" with NASA's robotic spacecraft. Daqri is another AR creation app.

There are also AR apps for android devices, including Google Skymap, which tells you which stars you are looking at when pointed at the night sky.  You can read about more Andriod (and iOS) AR apps (some for general info) in this Digital Trends article.


Check out AR, it is amazing, your students will love it!


ColAR coloring app

Sunday, April 27, 2014

My Diigo Tools Links (weekly)

Posted from Diigo. The rest of my favorite links are here.

Saturday, March 29, 2014

Using Bluetooth to Access the iPad via a Switch

There are several switch interfaces to use to access the iPad with a switch, but I am going to focus on the Blue2 switch interface from AbleNet, because that is the one that we have in the technology room at school. Other suppliers that sell switch interfaces include RJ Cooper and Inclusive Technologies. A switch interface uses bluetooth technology, which is built into the iPad, to wirelessly use a switch to access the iPad. This is convenient for users who do not have the fine motor ability to isolate their touch on the exact area of the iPad to select their choice.  This method only works with switch enabled apps, a few of which I have linked below. The Blue2 interface uses the scanning function that is also used for the VoiceOver accessibility function on the iPad, the user can select the highlighted choice using a switch.


Here is what the Blue2 switch interface looks like:
bluetooth wireless switch for disabled


To use a switch to access an app, you must set up the Blue2 and then open the app.  Follow these steps to get started:

  • Turn Blue2 on
  • Go to Settings>Bluetooth on the iPad.  
  • Click on the Blue2 option when it comes up.
  • Make sure that Mode 5 is selected on the Blue2 
  • Connect your own switch(es) or use the built in switch(es). 

Set up the app by tapping play and then setting the switch options, then tap the X


Users press the switch to initiate the action at the right moment, like jumping over obstacles:


To use SoundingBoard, a communication app from AbleNet, follow the steps above and then wait for the iPad to start scanning the choices.  Select the desired board or phrase when it is highlighted.  You can set timing options on SoundingBoard under settings.

Settings:                              Board List:                 Speech choices:


Switch enabled apps:

 Memory Pairs

ChooseIt! Maker


Smarty Pants

Proloquo2Go


There are many more. Click on the following links for a list of switch accessible apps apps:


Saturday, March 22, 2014

AT - Using Head Movements to Access the iPad


Picture from: http://www.technorms.com/

iOS 7 has a new feature that allows users to use head movements to operate the iPad.  It is under the accessibility settings (go to Settings > Accessibility > Switch Control).  This is a really nice feature for people who cannot access the iPad with their hands or their voice. It uses scanning technology, when the desired app or choice is highlighted you use your switch control settings to select the choice.  And it even works on some apps that are not "switch accessible".

You can set up switch control to choose from 4 switches - turning head left and turning head right (uses the internal camera), an external Bluetooth switch, or touching anywhere on the screen (for those who cannot isolate and target one spot).  Note: using the full screen makes it hard to turn off switch control with touch.  If this happens turn on Siri request it to activate assistive touch.  This turns off switch control. 


Each of these methods can be set up to do a variety of actions, such as select (tap), go to Home screen, increasing or decreasing volume, activating Siri, etc.  All of these options are listed under each switch set-up in the Settings app. 


Another feature is Point Scanning which is using cross hairs to pick a specific screen location. A popup menu appears at the pinpointed location for more choices.  One drawback, the iPad has to be positioned carefully to ensure the camera can see your face, or you will get a message at the top of the screen saying that it cannot.  Just adjust the angle a bit and it should work. Mounting or having a stand to keep it steady is recommended.


For more information go here.


Saturday, February 8, 2014

OneNote for Classroom Notetaking: Amazing!


If you have Microsoft Office Suite, you already have OneNote.  I had not even looked at it until today, but I am glad I did.  This is an amazing tool that keeps notes (and more) in a format that looks like a 3 ring binder (similar to LiveBinders). You can save multiple notebooks, with tabbed sections and pages within the sections.  It allows you to share and collaborate on a notebook and color codes changes by user (like Google Drive).  But it has many features that these free products do not have.  

The most important feature (I think) for assisting students' note-taking, is the audio recording feature.  You can record a lecture while writing notes, and the audio syncs with the written notes, so the student can hear what the teacher was saying when the selected text was written, to verify what the notes mean. This is similar to the iPad app called Noteability, if you've seen that.  But, for me, the interface on OneNote is more intuitive. 

But wait, there's more!

You can type, or use a mouse, or a stylus or your finger on a touchscreen to handwrite notes and draw diagrams. The notes can be converted to digital text later.  Notes can be added anywhere on the page just by clicking and typing. It automatically creates a text box wherever you begin typing!


Image of the drawing function, where you can see the layout - Notebooks on the left, tabs on the top and pages on the right margin.  
Image credit: http://techyjunction.wordpress.com/category/install-office-2013/


You can also import video or images, and OneNote automatically adds a reference for the source of the image if imported from the web.  You can insert tables, Excel spreadsheets or almost any computer file.  You can draw diagrams as well. It even has a built in calculator. 


You can also share your notes with others and collaborate on a note or notebook together (like Google Drive or Wiki).

It is also available as an iPad app or Android app and on the web, so you can access your notes anywhere, even on a computer that does not have OneNote installed.  You need MS Skydrive for sharing and syncing.

Watch this quick video to see how to set up a notebook on OneNote.  This will link you to several other YouTube videos and tutorials for more info on how to use OneNote.


OneNote is a Microsoft application and comes bundled with Office, or can be purchased separately, but you can also get a free one month trial online at OneNote.com.   

OneNote has been available since Office 2003, with Service Pack 1, but may not have all the features noted here (I am reviewing OneNote 2010, there is a 2013 version as well)